ProbeApp for Centroid CNC12
ProbeApp for Mill & Routers that integrates with Centroid CNC12
Project maintained by swissi2000 Hosted on GitHub Pages — Theme by mattgraham
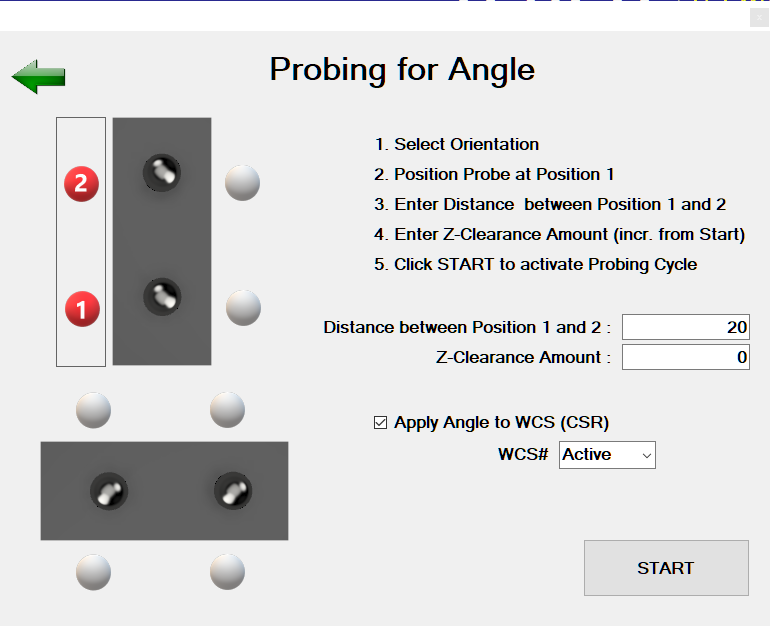
Angle Probing Cycle
Description
Find the Angle of a Surface. This probing cycle is available for all versions of CNC12 (automated CSR function not available for CNC12 Free).
Implementation Details
The Angle probing cycle is able to measure the surface angle of X, Y and Z-Surfaces along the X or Y-Axis. For X and Y-Surfaces, the measured angle can be used to automatically rotate the coordinate system (CSR) on any of the available WCS numbers. For more information on CSR, consult the CNC12 Mill User Manual.
The probe needs to be placed at the number 1 spot of the selected probing orientation. For measurements of X and Y-Surface angles, the Z-Height has to be set at the level the measurements needs to be taken on the surface. For Z-Surface angles, the probe can be placed above point 1 on the Z-Surface at the desired distance and the Z-Clearance Amount must by high enough that the probe can travel to measurement point 2 without being tripped.
At the end of the probing cycle, the probe will be at the retract position at point 2 of the probing cycle and the measured Angle will be displayed:
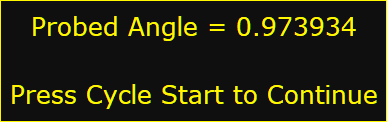
Note that this message can be surpressed if “Apply Angle to WCS (CSR)” is checked and the configuration settings have been made to skip the measurement display. See Configuration Options for details.
If “Apply Angle to WCS (CSR)” was checked, the CSR WCS reset message will be displayed:
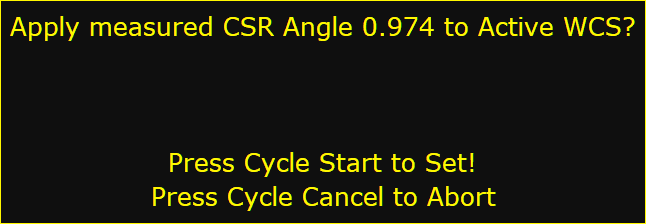
Note that this message can also be surpressed if a direct CSR WCS reset is desired withou a prior CSR WCS Reset Info message display. See Configuration Options for details.
Probing Parameters
Distance between Position 1 and 2
The parameter Distance between Position 1 and 2 specifies the lenght the probe will travel from the start point (Point 1) where the first measurement is taken to Point 2 where the second measurement takes place. The longer the distance between the two measuring points the more accurate the measurement will be but make sure the distance does not go past the edge of the measured surface.
Z-Clearance Amount
The Z-Clearance Amount specifies the distance the probe will move up on the Z-Axis to travel from Point 1 to Point 2. For the measurement of X or Y-Surface angles, this amount can be 0 if there are no obsticals (clamps etc.) between Point 1 and Point 2. For the measurement of Z-Surface angles, this amount needs to be high enough that the probe can travel to Point 2 without getting tripped.
###Apply Angle to WCS (CSR) This option is not available for the CNC12 Free version. This check box will also not be displayed for Z-Surface Angle measurements.
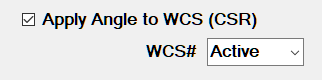
If the Apply Angle to WCS (CSR) box is checked, the measured surface angle will be applied to the selected WCS to rotate the coordinate system (CSR). By default, the CSR angle will be set for the currently Active WCS #.
Note that the available WCS numbers depend on the version of CNC12:
- CNC12 Free: Only WCS #1 (G54) is available
- CNC12 Pro: WCS #1 - #6 (G54 - G59) are available
- CNC12 Digi: WCS #1 - #18 (E1 - E18 where E1 - E6 is the same as G54 - G59)
Any of the available WCS # can be selected for the CSR Angle to be applied.
Start the Probing Cycle
After making all the selections necessary on the screen, pressing the START button will start the parameter validation. A message will be displayed if any of the parameters are missing or invalid.

If no validation issues have been found, the ProbeApp will write all the necessary probing commands to
c:\cncm\ncfiles\probing_cycle.cnc
The ProbeApp will close giving control back to CNC12

At this point the Probing Cycle can be started by pressing Cycle Start or aborted with Cycle Cancle.
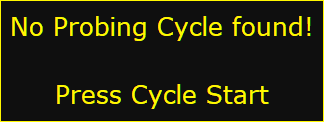
Closing ProbeApp without a Probing Cycle selections
The Probing Cycle screen can be closed by either pressing the X on the top right corner of the window or pressing the Green Back Arrow on the top left. This will open the ProbeApp main window where the Exit button can be pressed.
Control will go back to CNC12 where this message will be displayed:
Pressing Cycle Cancle will terminate the cycle immediately. Pressing Cycle Start will bring up this message:
Pressing Cycle Start at this point will also terminate the cycle.